Ensembl biomart注释数据库的使用
如题。本文探索了从Ensembl biomart中导出基因组注释文件的方法。下文中的步骤主要针对dNdScv的输入,但也可以用于其他的生信分析任务。
起先是因为在看dndscv文档的时候,注意到文档里面提到对于自定义物种的reference的构建,需要提供一个 chromosome_segment.txt 的注释文件(如下图)
这个注释文件需要包括下面这些字段:
- Gene ID
- Gene name: 这是dNdScv将使用的基因名称。如果提供了具有相同基因名称的多个转录本,buildref将使用最长的编码CDS作为dNdScv的参考CDS
- CDS ID: 每个转录本的唯一标识符。默认使用Ensembl蛋白ID
- Chromosome name: 染色体编号。需要与提供的fasta序列文件中的染色体编号一致。
- Chromosomal start
- Chromosomal end
- CDS start
- CDS end
- Length
- Strand: 编码方向。正链为
+1,负链为-1。
另外,文档里面提到:
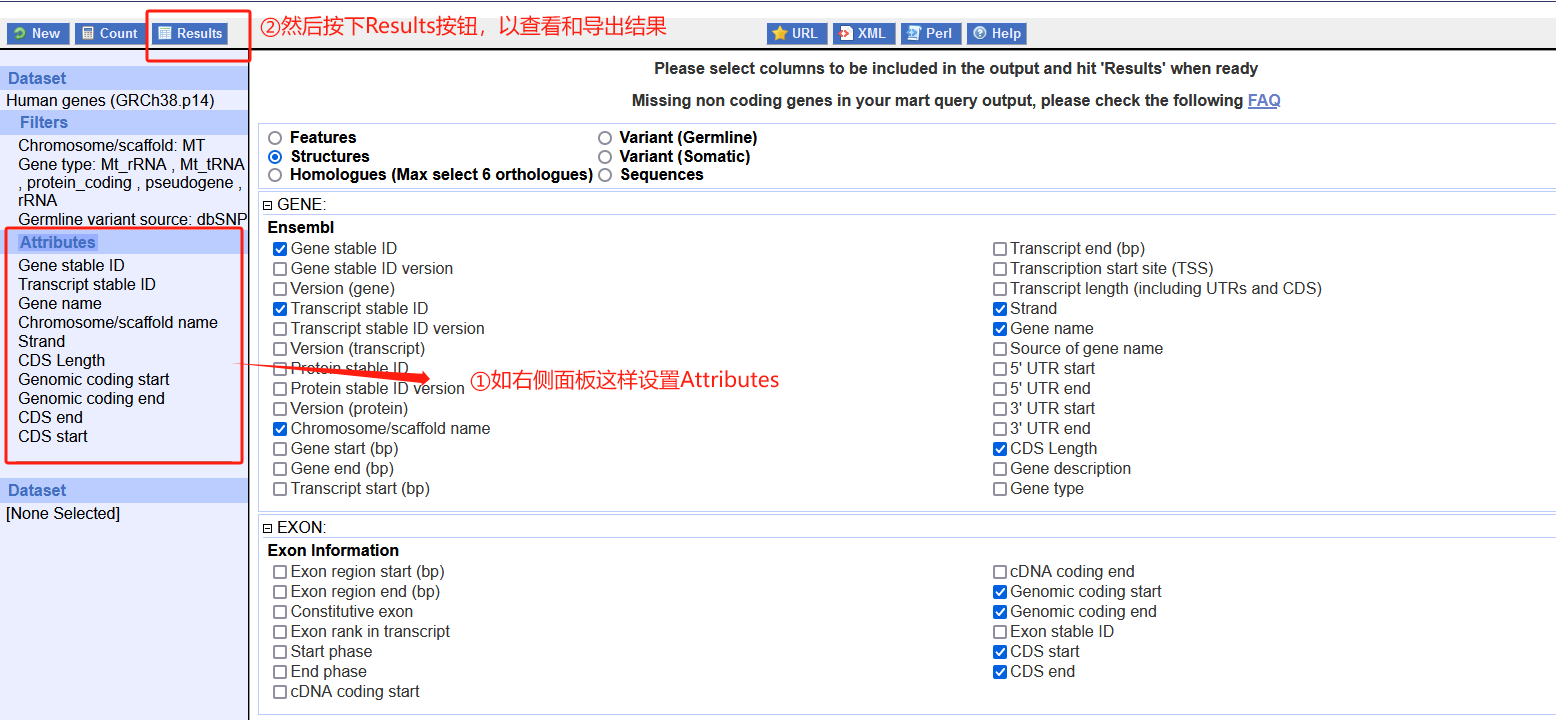
The buildref function was originally designed to use a table of transcripts from Ensembl BioMart as input. You can use the BioMart website to download all coding transcripts from a given genome assembly for a wide range of species. Withing BioMart, click on the “Ensembl genes” database and choose your species of interest. Then use the “Attributes” menu on the left and click on the “Structures” option (exon-level information) to select the 10 columns needed by buildref. Make sure that your table has all 10 columns in the right order, which you achieve by selecting each attribute in the right order (see example image below).
(buildref函数最初的设计目的是使用Ensembl BioMart的转录表作为输入。可以使用BioMart网站下载各种物种的给定基因组组装的所有编码转录本。使用BioMart,点击“Ensembl基因”数据库,选择您感兴趣的物种。然后使用左侧的“属性”菜单,单击“结构”选项,选择buildref所需的10列。确保您的表中所有10列的顺序正确,这是通过以正确的顺序选择每个属性来实现的)
也就是说,这个buildref需要的注释文件可以直接从BioMart数据库中导出。
BioMart的网址是: https://www.ensembl.org/biomart/martview/
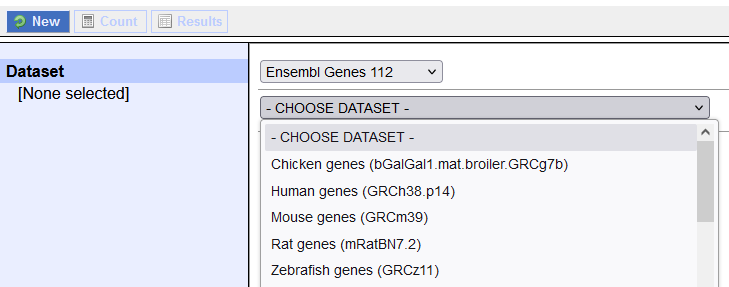
进入之后,首先需要选择要连接到的数据库和数据集(就像MySQL刚刚登录到shell一样,需要先connect到一个database上面),如下图。

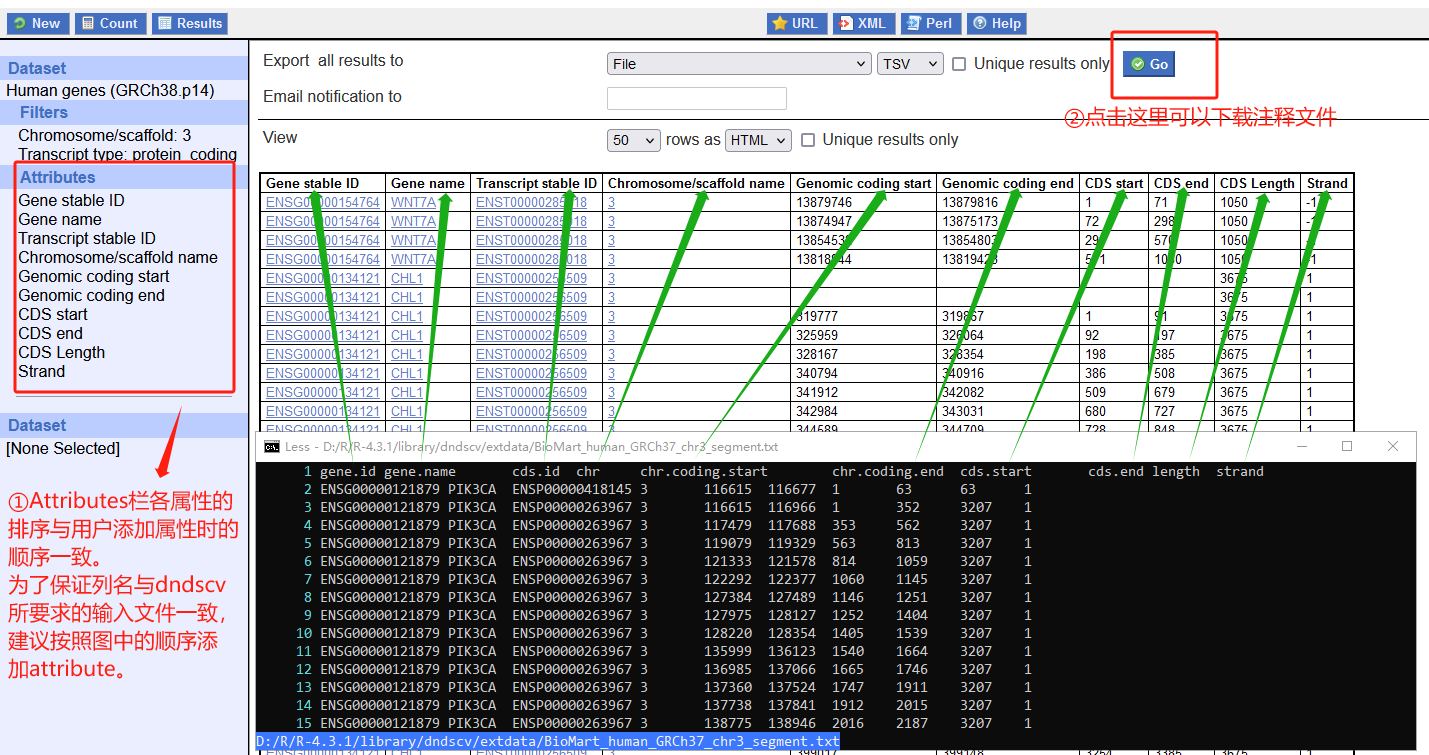
这里主要可以调整的就是下面的这些东西,一个是筛选器栏,用于筛选出特定的基因列表;一个是属性栏,用于设置视图中需要显示的属性。
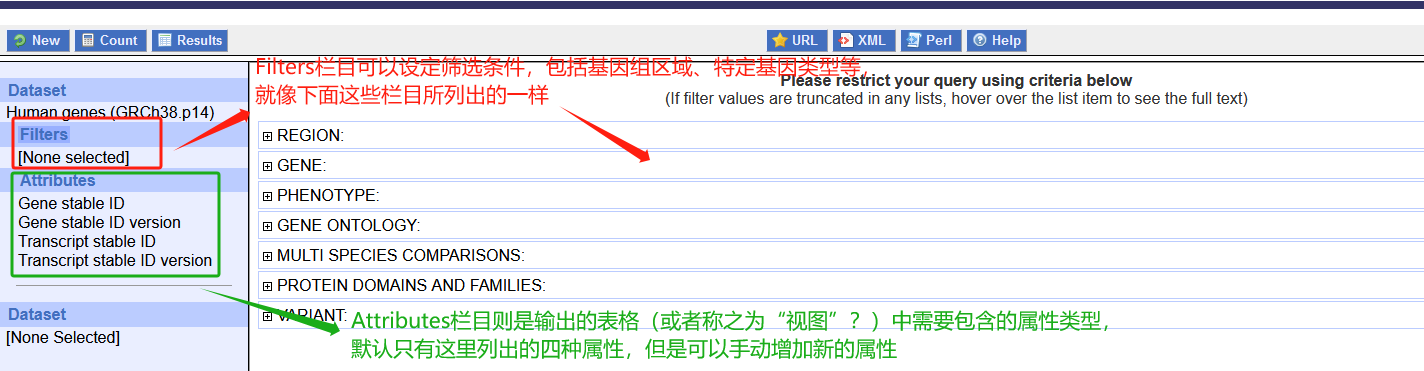
我们首先在Filters栏设置筛选器(筛选器估计是必须选的,即使我们不想过滤一些基因,那么也得在这里选择染色体和基因组坐标。另外,对于多个项目,可以在鼠标选择时按Ctrl键,以实现多选)。
然后,按照下图这样设置Attributes。如果是为了将结果作为基因组CDS annotation以便导入到dndscv,可以参考下面这样的Attributes设置。设置完成以后,按下Result按钮,可以查看和导出结果。
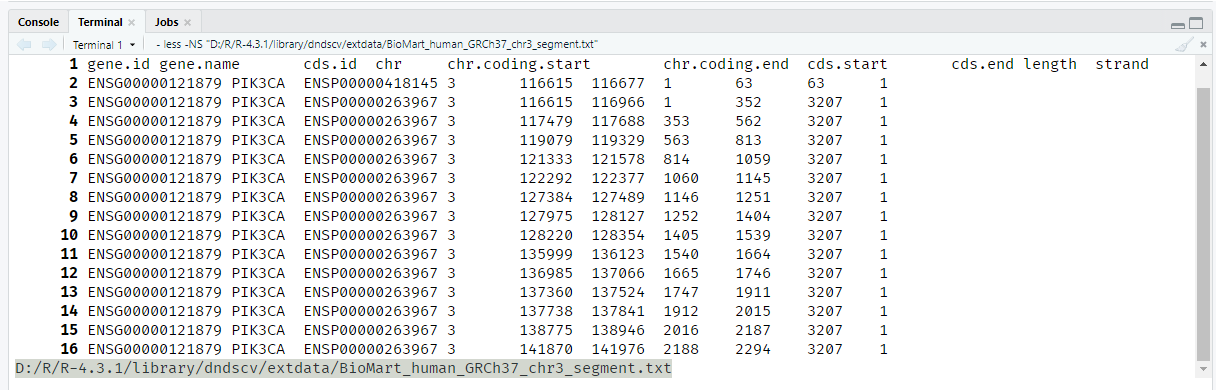
结果如下
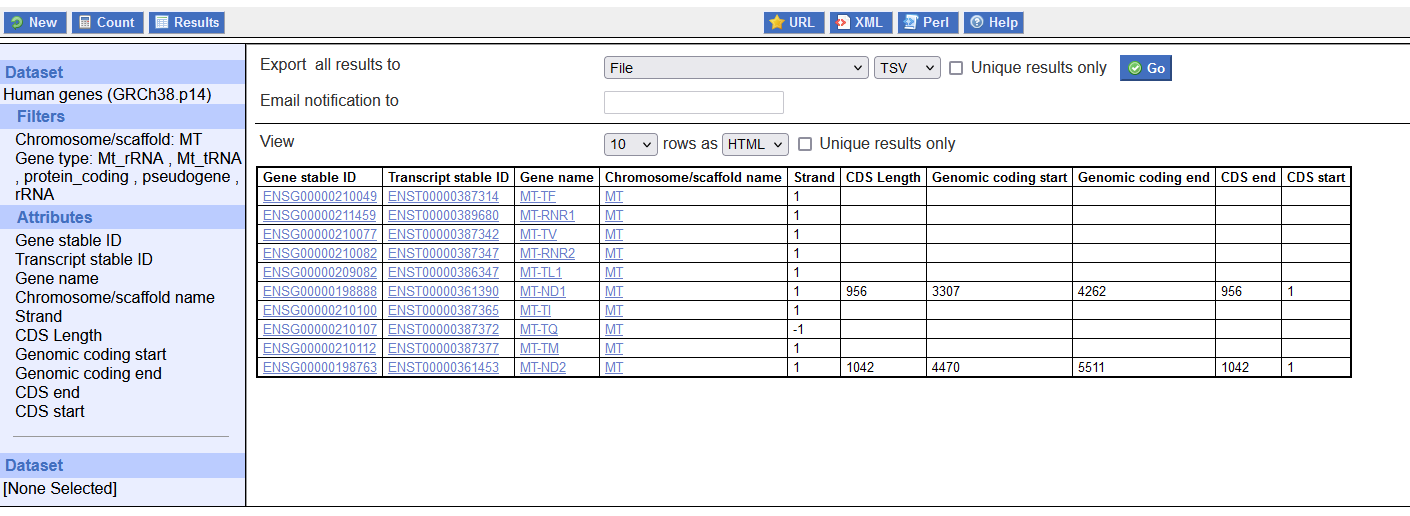
可以把biomart的截图和dndscv提供的示例文件放在一起做一下对比,可以看到二者的内容基本一致。至于输出文件中的列的排序,其由Attributes栏中各个属性的顺序决定,而Attributes栏各属性又是按照用户添加顺序排序的。因此,为了避免后续处理的麻烦,可以按照下图Attributes顺序添加属性。